Recycled Blooms: Flower Prints Made with Everyday Materials
Turn recyclables into a garden of colorful prints! Learn to transform a cardboard paper roll and the textured bottom of a plastic bottle into simple flower-printing tools. By cutting, dipping, stamping, and layering shapes, you can explore pattern, color, and composition while discovering how ordinary objects can be reused in creative ways.
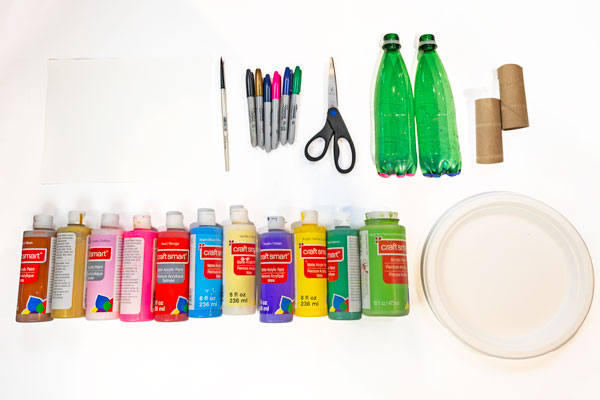
Materials:
– Cardboard toilet paper and paper towel rolls
– Empty plastic bottles with textured bottoms
– Acrylic paint in several colors
– Paper plates or shallow trays for paint
– Heavy drawing paper or cardstock
– Scissors
– Paintbrushes or cotton swabs for stems, leaves, and flower centers
– Markers or crayons for added details (optional)
Before Printing & Painting: Rinse and dry the bottles. Remove caps and labels if desired. For younger children, pre-cut the cardboard rolls or closely supervise all scissor use.
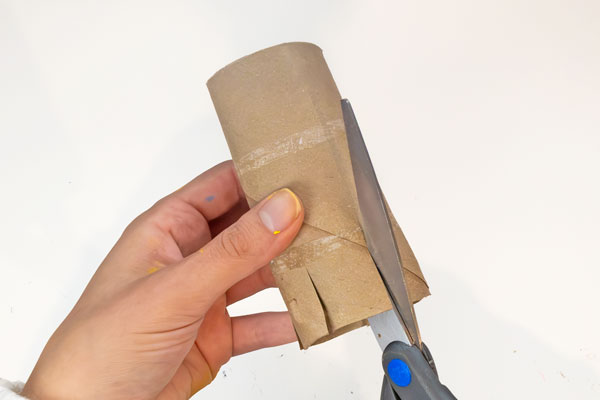
Step 1: Create the cardboard flower stamp. Make several straight cuts from one end of a cardboard roll, stopping about 1 to 1½ inches from the end. Space the cuts around the entire roll to create a fringe.
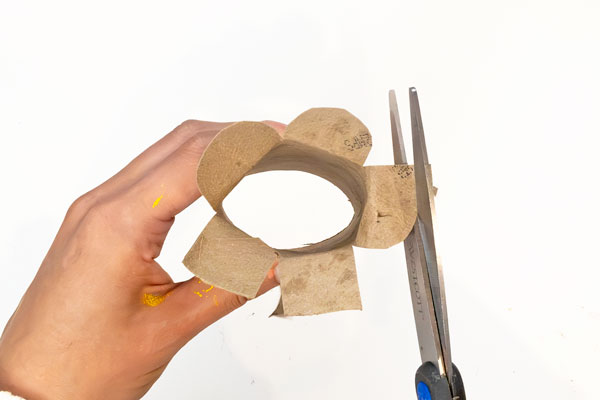
Step 2: Shape the petals. Gently bend the fringed strips outward. Leave them narrow for a daisy-like flower, round the ends, or trim some strips shorter to make a different petal shape. Make more than one stamp if you would like flowers in different sizes or styles.
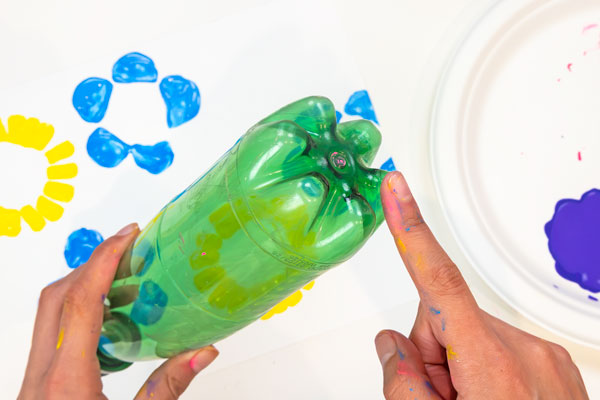
Step 3: Prepare the bottle-bottom stamp. Stand the empty bottle upright and hold it by the neck. The raised sections on the bottom will become petals when stamped. No cutting is needed.
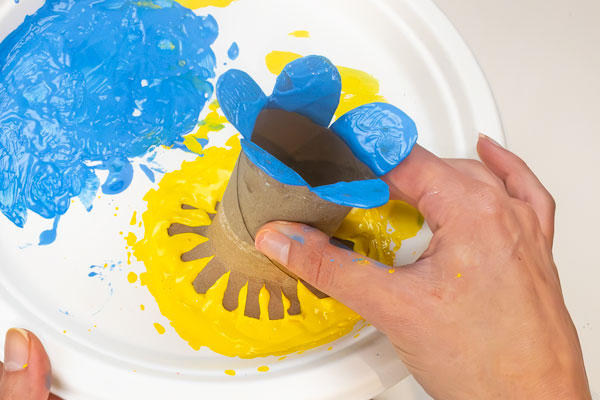
Step 4: Adding Paint. Press one of your “stamps” lightly into a thin layer of paint. Lift straight up. Make sure that the strips of your stamp or the raised sections of your bottle are completely covered. You can also use a paint brush to add paint to any missed spots.
Make a test print on scrap paper. If the print looks smeared, use less paint. If it looks too faint, add a little more.
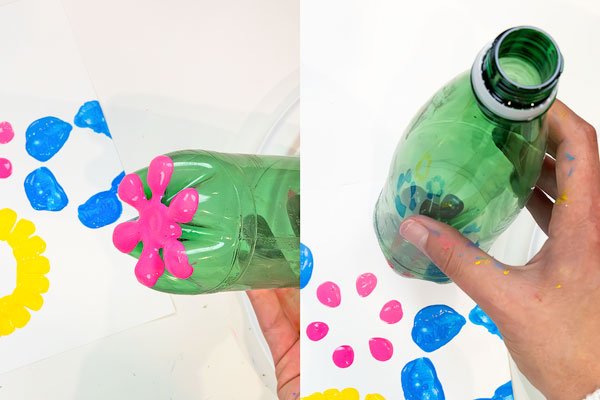
Step 5: Print the flowers. Press the stamp firmly onto the paper without sliding it. Use your fingers or the handle of your paintbrush to gently press down on the strips of your stamp. Lift straight up to reveal the flower. Repeat with the cardboard roll and bottle-bottom stamps, leaving space between flowers or overlapping them to create a full garden.
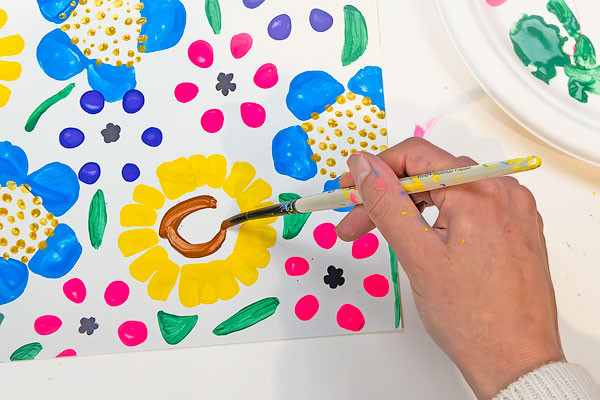
Step 6: Layer colors and add centers. Let wet prints rest briefly before adding another color. Stamp a smaller flower inside a larger one, or use a cotton swab or paintbrush to add the flower centers.

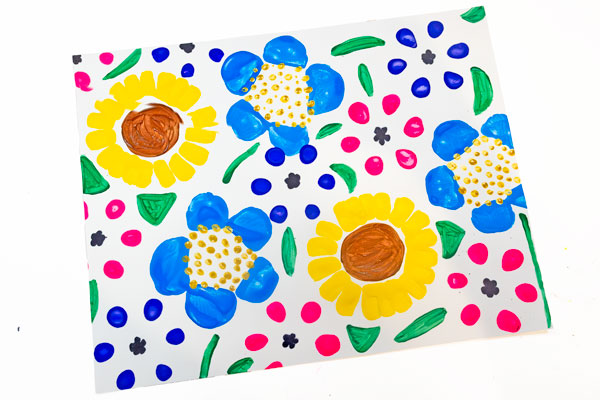
Step 7: Complete the garden. Use a paintbrush, marker, or crayon to add stems, leaves, grass, insects, or a background. You may also turn the prints into a bouquet, greeting card, wrapping paper, or repeating pattern.
Step 8: Dry and clean up. Place the finished artwork flat in a designated drying area. Rinse reusable bottles and tools promptly, recycle or save the cardboard stamps when possible, and wipe the work surface clean.
Further Learning and Discussion Questions:
Discussion questions for reflection:
1. What shapes and textures do you notice on the recycled objects before they touch the paint?
2. How are the two flower stamps alike, and how are they different?
3. What happens when you rotate, repeat, overlap, or layer your printed shapes?
4. Which colors did you choose, and how do they change the mood of your garden?
5. What other safe household objects might create interesting prints? What shape do you predict each object would make?
6. How does reusing an object for art help us think differently about materials we might otherwise discard?
Further Learning
Observe real flowers: Look closely at flowers outdoors or in photographs. Count the petals, compare the centers, and notice whether the petals are round, pointed, wide, or narrow. Then design a stamp inspired by what you observe.
If you cannot get outside, or if the season has changed and flowers are no longer in bloom, you can still observe nature through the Smithsonian Learning Lab. Explore its collection of flower and plant images, paying close attention to the colors, shapes, petal arrangements, and other details you notice. Use these observations as inspiration for your flower prints or to design a new printing tool.
https://learninglab.si.edu/collections/observational-flower-and-plant-drawings/zDGd1JLxTbpwqPC3?