Monet-Inspired 3D Water Lilies
Explore color, texture, and layered design as you create a Monet-inspired water lily artwork that lifts off the surface. In this Family Art Workshop, participants will paint a cardboard base to represent a pond and then build three-dimensional water lilies using construction paper, tissue paper, or a combination of both. Inspired by the work of Claude Monet, this project encourages young artists to think about how light, color, and layering can create depth and movement. The result is a vibrant, textured piece that blends painting and sculpture.

Materials:
Cardboard base
Acrylic paint (blues, greens, purples, whites)
Paintbrushes
Water cups and paper towels
Construction paper (variety of colors)
Tissue paper (variety of colors)
Scissors
Glue (school glue or glue sticks)
Optional: oil pastels or markers for added details
Step 1: Paint the Pond Base

Use paint to cover your cardboard base with colors that represent water.
Blend blues, greens, and purples to create depth. You can add lighter areas to suggest reflections or movement in the water.
Allow the paint to dry before adding elements on top.
Step 2: Create Lily Pads

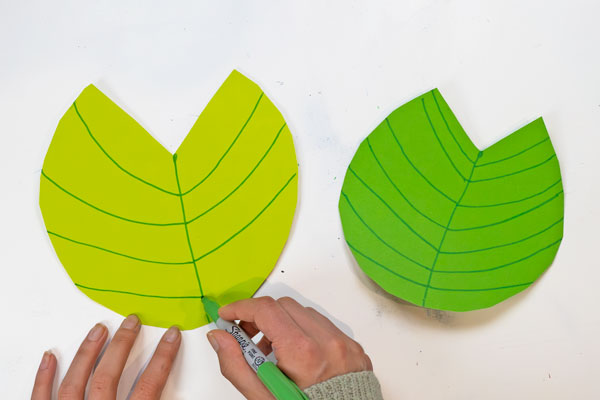
Cut oval or round shapes from green construction paper to represent lily pads. Add lines or details using markers or oil pastels to show texture and veins.
Step 3: Build 3D Water Lilies
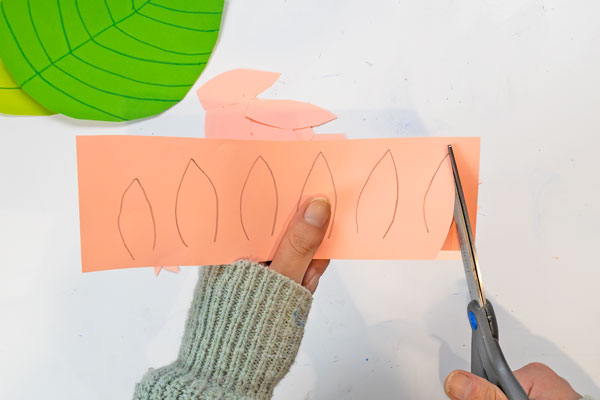
Cut petal shapes from construction paper or layer small pieces of tissue paper.
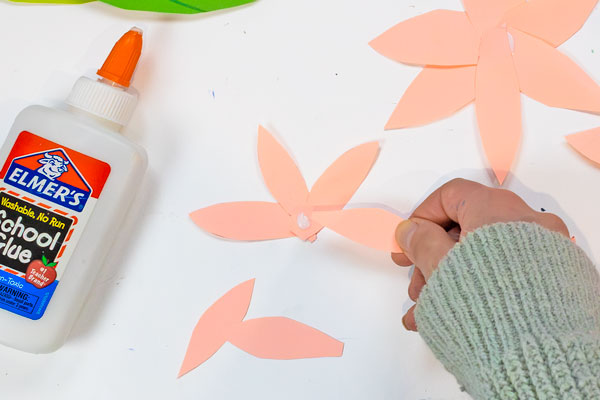
Glue petals together in layers to form a blooming flower.
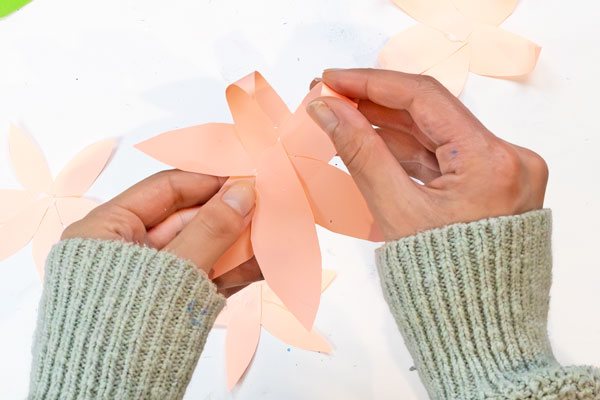
Gently fold, curl, or crumple the material to create dimension.
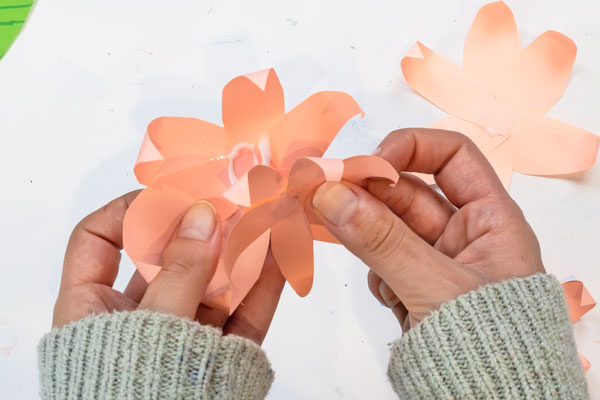
Add Dimension. To make your lilies stand out, lightly fold the petals upward or layer tissue paper loosely so the flower rises off the surface. You can also stack small pieces to increase height.
Step 4: Arrange Your Composition & Attach the Elements

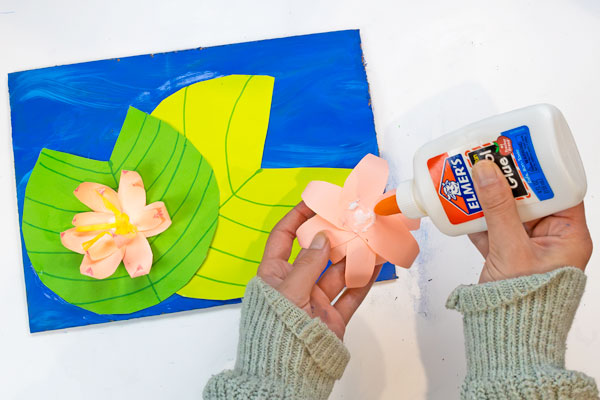
Place your lily pads and flowers onto the painted background. Think about spacing, overlap, and balance as you design your pond scene. Glue the lily pads first, then attach the 3D flowers on top. Press gently while allowing the petals to keep their shape and dimension.
Step 5: Final Touches

Add details such as ripples, reflections, or additional plants using paint, markers, or pastels. Allow everything to dry completely.


Further Learning and Discussion Questions:
Discussion questions for reflection:
- How did you choose your colors for the water and flowers? What mood do they create?
- How did you use layering or folding to make your flowers look three-dimensional?
- What do you notice about how water and light interact in your artwork?
- How is your piece similar to or different from Monet’s paintings of water lilies?
- If you were to create another version, what would you change or explore next?
Further Learning
- Art and Observation: Claude Monet painted the same pond many times, noticing how light, color, and time of day changed what he saw. You can try observing the same scene at different times and creating multiple versions. https://www.philamuseum.org/collection?query=Claude%20Monet
- Explore Materials. Experiment with different combinations of construction paper and tissue paper. How does each material change the look and texture of your flowers?
- Layering Techniques. Try adding more layers to your water using transparent washes of paint or additional paper elements to create depth.
- Create a Series. Make multiple water lily artworks using different color palettes such as sunrise, sunset, or nighttime.
- Group Installation. Display multiple artworks together to create a larger “pond” made by the whole group. Notice how individual pieces contribute to a collective visual experience.
- Share Your Creation. Display your artwork or share it with others. Your piece reflects both careful observation and creative interpretation, just like Monet’s work.