Gelli Printing with Fall Flowers
Immortalize your favorite fall flowers by capturing them in gelli prints! Learn the step by step gelli printing process to create prints, cards, and more. In this project, you learn about layering and composition while exploring colors and patterns.
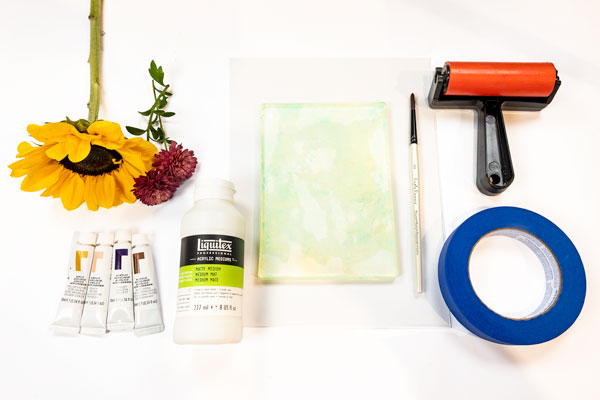
Materials:
– Gel plate
– Brayer
– Flowers (suggested fall favorites: daisies, chrysanthemums, sunflowers, asters, rudbeckia)
– Acrylic paint in several colors
– Cardstock or heavy drawing paper
– Acrylic matte medium
– Painters tape
– Paintbrushes or cotton swabs for details
– Heat gun or hair dryer (optional for use on paper only)

Before Printing: Use painters tape to create a border around your cardstock or heavy drawing paper. Use a prepared background or create one using the gel plate, making sure to select colors that will contrast with your flower print color selection.
Create your background.
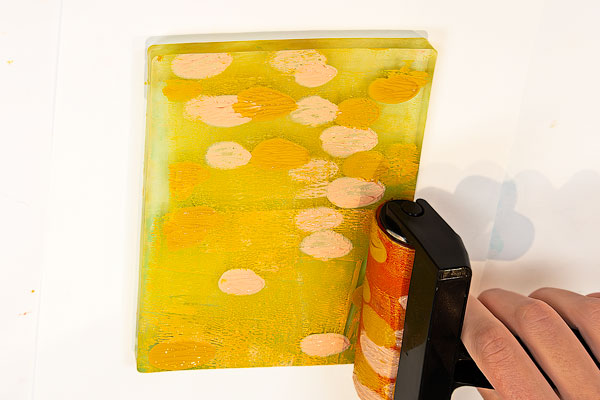
Add your preferred colors of acrylic paint to the gel plate. Using a clean brayer, evenly roll out the paint to create the background of your print.
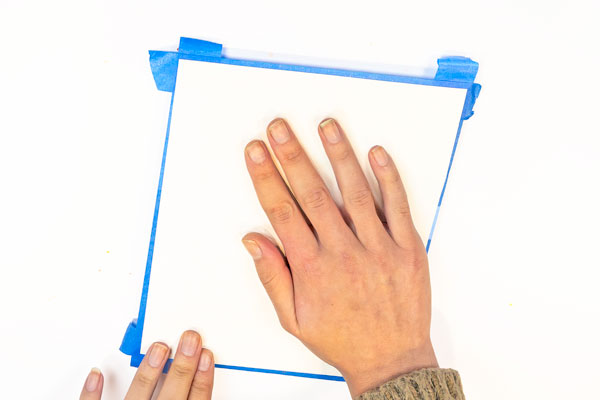
Gently press the cardstock, taped side down, onto the gel plate. With firm pressure, using your palm to continue pressing into the back of this print with wide swiping motions. Carefully peel this layer off, set aside, and allow to dry completely. Explore creating gradients by using different color combinations.
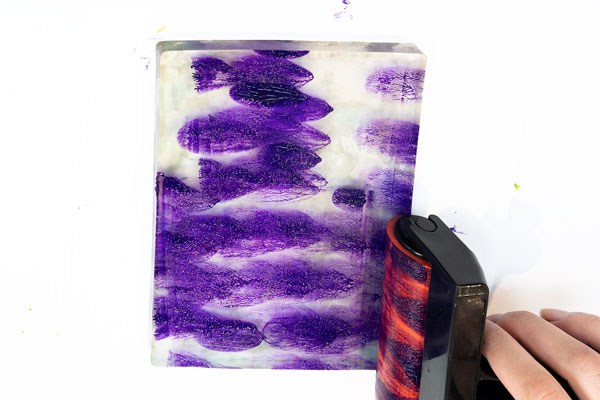
Roll out a contrasting layer of paint. Use a clean brayer and gel plate for this step. Add contrasting acrylic paint to the gel plate and roll out evenly. This will become your flower details layer.
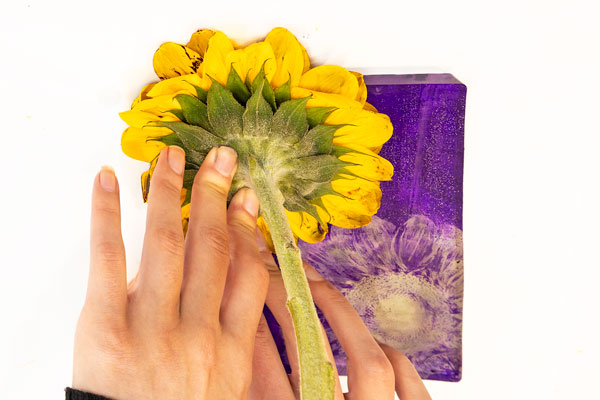
Press your flowers. Firmly press and remove your flowers face-down onto the gel plate to create the composition you want. This will leave a negative image. Allow this layer to dry. Do not use a heat gun on the gel plate.
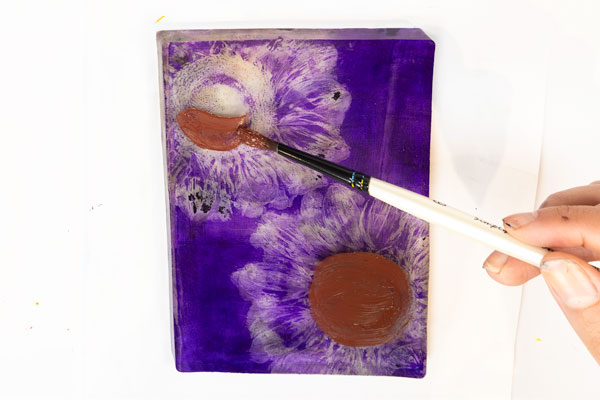
Add details to your flowers. Carefully add acrylic paint to the center of your flowers using a paintbrush or cotton swap. Be mindful not to smudge the existing layer by using a light touch. Allow this layer to dry before proceeding.

Applying the matte medium. Using a clean brayer, apply a thin, even layer of matte medium. Do not let this layer dry before proceeding.
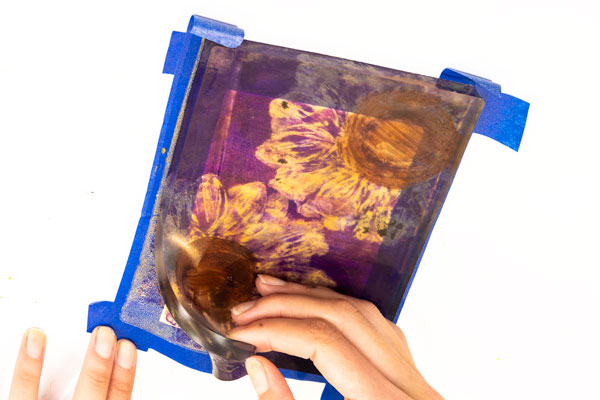
Completing the print. Line up the prepared cardstock background (taped side down) and press carefully into the gel plate. With firm pressure, use your palms to continue pressing into the back of this paper in wide swiping motions. Allow to dry. Gently flip both plate and paper over and peel to separate. When dry, carefully peel away the painters tape to reveal the border.
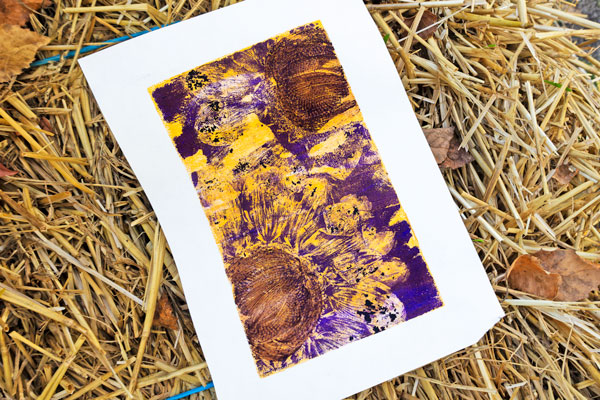
Further Learning and Discussion Questions:
Discussion questions for reflection:
1. What flowers did you choose? What other seasonal flora could you use to create prints?
2. How would you describe your composition? Is it orderly? Is it busy? How else can you play around with the space?
3. Which colors did you choose? Do you associate them with the fall season?
4. How could you add more detail to this print? Could you add any other media, like gold foil or text?
Further Learning
What’s a plant hardiness zone? Want to know more about what fall flowers grow in your area? Check out the US Department of Agriculture Plant Hardiness Zone Map to find out which flowers you can expect to grow.
If you want to learn more about a flower that is not local, or no longer in season, check out the US National Arboretum Plant Finder & Interactive Map. Best viewed on a desktop, this exploratory map encourages users to search by scientific or common plant names, as well as by location. More information about this can be found here.