Art Inspiration Wheel
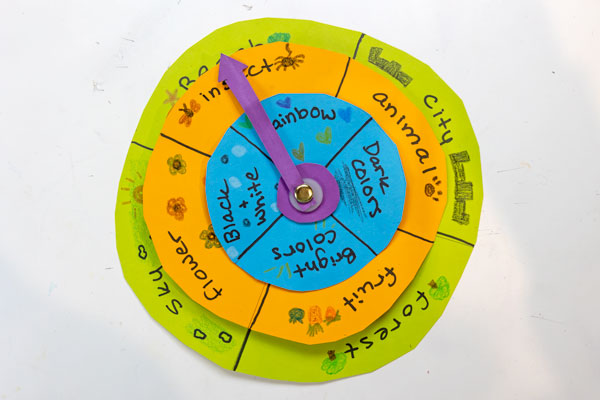
Spark your creativity with your own Art Inspiration Wheel, a hands-on tool designed to generate imaginative art ideas with every spin. In this Family Art Workshop, participants will design and construct a multi-layered spinning wheel filled with prompts such as colors, subjects, styles, and materials. A movable spinner will point to selected prompts, guiding artists toward unexpected combinations. This interactive project encourages creative risk-taking, problem-solving, and playful exploration, helping artists move beyond the question of what to make and into action.
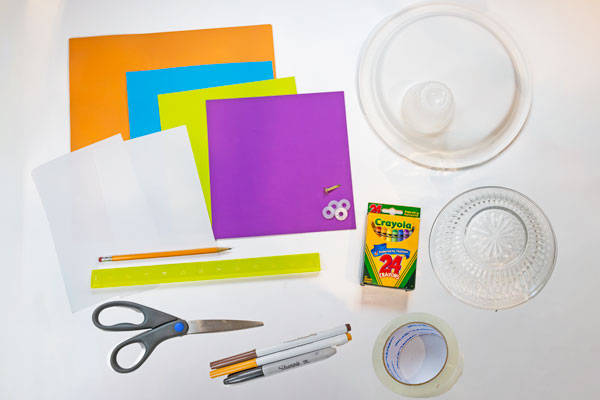
Materials:
Cardstock or lightweight cardboard (for wheel base and layers)
Paper (for planning prompts)
Scissors
Markers, colored pencils, or crayons
Brad fastener (paper fastener)
Nylon Washers
Scrap cardstock (for spinner arrow)
Ruler (optional)
Pencil
Circular objects for tracing (different sizes for layered wheels)
Step 1: Create the Wheel

Trace and cut out a large circle from cardstock or cardboard. This will be the base of your wheel.
Trace and cut 2 to 4 smaller circles that will stack on top of the base.
Each circle should be slightly smaller than the one beneath it so that all layers are visible when assembled.
Step 2: Divide into Sections
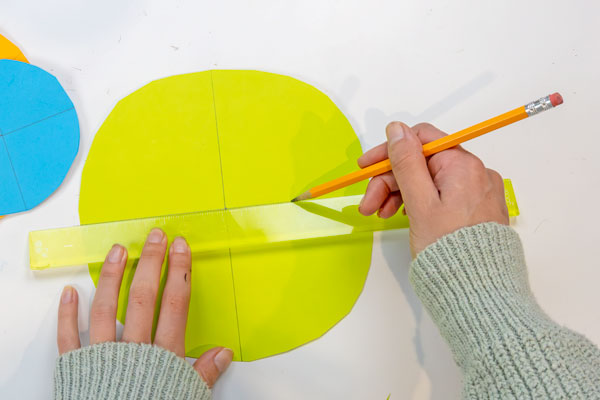
Use a ruler to divide each circle into equal sections, like slices of a pie. Each section will hold a different prompt.
Step 3: Add Creative Prompts

On each wheel layer, write a different category of prompts.
For example:
Colors: red, blue, neon, pastel
Subjects: animal, landscape, character, object
Styles or Actions: abstract, realistic, upside down, pattern
Materials or Textures: smooth, rough, collage, watercolor
Step 4: Decorate the Wheel

Use markers or colored pencils to decorate each section. You can color-code categories or add illustrations to make your wheel more engaging and visually clear.
Step 5: Create the Spinner Arrow

Cut a small arrow shape from scrap cardstock. Make sure the arrow can point clearly to each section of the wheel.
Cut out a small circle from the scrap cardstock to help the arrow rotate easily.
Step 6: Assemble the Wheel

Create a hole in the center of each layer.
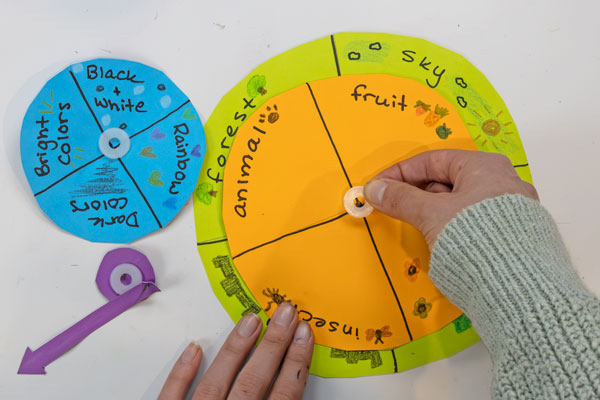
Stack the circles from largest to smallest and align their centers, with the arrow at the top. Place a small nylon washer between each layer to create space and reduce friction so the layers can spin freely.

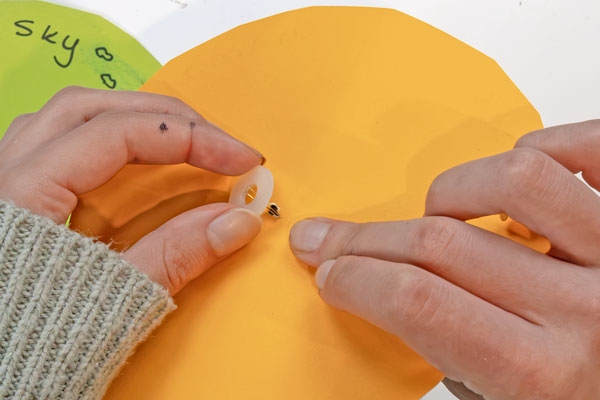
Push a brad fastener through the center of the arrow, layers, and washers. Fasten the brad loosely on the back, making sure everything can rotate smoothly without being too tight.
Step 7: Use the Art Inspiration Wheel

Spin the wheel layers and the arrow. Wherever the arrow lands on each layer identifies the prompts you will use. Combine those selections to create your artwork.
Further Learning and Discussion Questions:
Discussion questions for reflection:
- How did you decide what categories and prompts to include on your wheel?
- What happens when you combine prompts you would not normally choose?
- Did your wheel challenge you to try something new or unexpected? How did that feel?
- How did you figure out how to combine your prompts into one cohesive idea?
- How might using a shared wheel change the way a group creates together?
Further Learning
- Creative Exploration: Tools like an Art Inspiration Wheel help artists move past creative blocks by introducing unexpected combinations of ideas, materials, and approaches. https://www.youtube.com/watch?v=KcocWNey5p0
- Try Multiple Spins. Spin the wheel more than once and compare your results. Which combinations feel exciting? Which feel challenging?
- Make It Personal. Create another version of your wheel with themes that reflect your interests such as favorite places, hobbies, or stories.
- Collaborative Creation. Work with a partner or group and combine your wheels. How do different ideas come together when shared?
- Expand the Wheel. Add more layers or categories over time. Your wheel can grow as your creativity grows.