Polymer Clay Coil Pot
Coil building is a traditional ceramics handbuilding technique dating back thousands of years. Some of the most well-known coil-built vessels come from Africa, Asia, and Ancient Greece. Learn how to build a basic coil-constructed vessel using polymer clay. Because of the nature of polymer clay, this vessel will be constructed using a reverse method, beginning with the rim and working downwards to the foot.
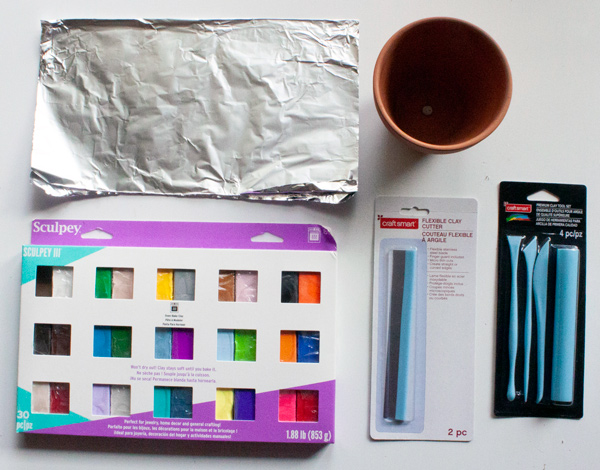
Materials:
- Polymer Clay
- Rolling Pin
- Clay Knife
- Clay Modeling Tools
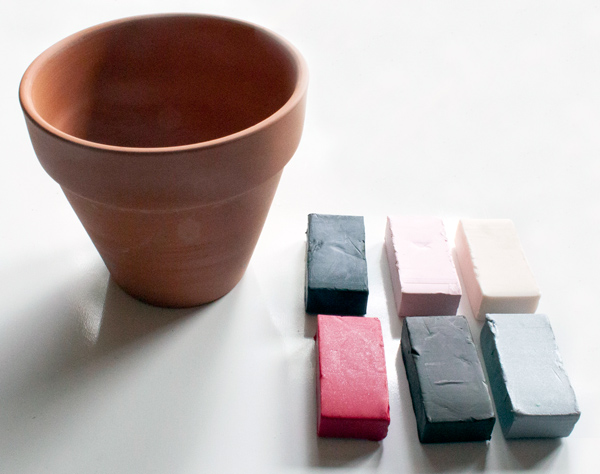
- Mini Terra Cotta Pot
- Aluminum Foil
Step 1: Begin by conditioning the polymer clay by working the clay until it is soft and malleable. Depending on the brand and the clay’s age, it may be soft or stiff and challenging to work with when removed from the packaging. To condition the clay by hand, begin rolling the clay in between your hands. The warmth from your hands will help the clay soften.
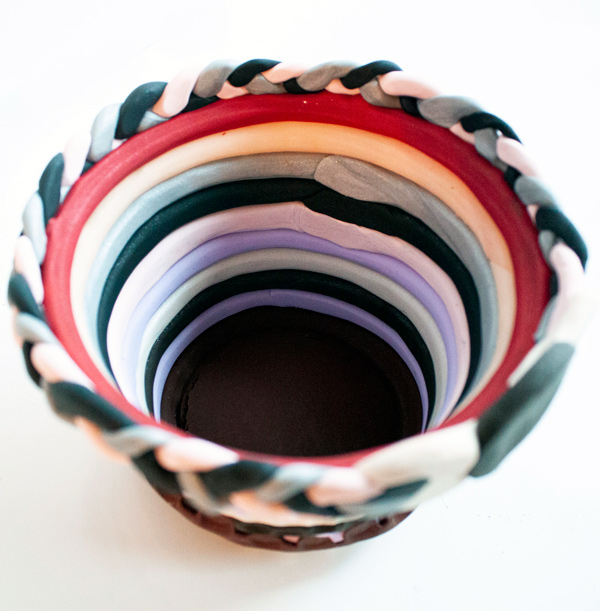
Step 2: Once the clay is soft, make a clay coil. A clay coil is similar to a playdough snake. Begin to shape the coil in between your hands. Next, place the fat, short coil on a smooth surface. Place your hands over the center of the coil and begin to roll it as you move your hands slowly towards the ends of the clay as you roll. The coils should be thinner than the width of a finger.
Step 3: Use a mini terra pot as a mold. Flip the pot upside down with the pot’s rim on the surface. Beginning just above the banded rim, place the coil around the pot. Measure where the coil meets. Remove the coil and place it back on the surface. Cut each end at an angle where the two ends meet.
Step 4: Place the coil back on the terra cotta pot and join the ends together by gently smudging the ends.
Step 5: Continue this process until the coils are about ½” from the bottom of the terra cotta pot.
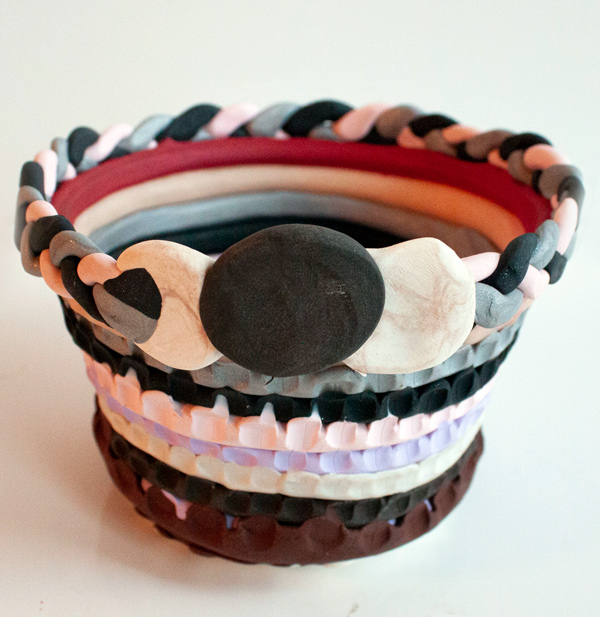
Step 6: Next, create the bottom of the pot. Roll a ball of clay that is about the size of a small meatball. Squish the ball between your palms and then place it on the surface. Use a rolling pin to flatten the ball further. The goal is to make this flat disc larger than the bottom of the terra cotta pot.
Step 7: Roll another flat disc. This time make it slightly smaller. This disc will add thickness to the bottom of the polymer coil pot. Press the disc onto the bottom of the pot to measure. This will leave an imprint on the clay. Using a clay knife, trim along the imprint to remove the excess. Place the disc on the bottom and press to attach.
Step 8: Use a clay modeling tool with a smooth, rounded bottom to blend one coil into another. This will serve to connect the coils as well as become a decorative element.
Step 9: Consider the rim of the pot. If desired, create a decorative rim. Using the ends of the saved coils, braid or twist them together. Place the braided coil onto the pot. If it is too short, create additional decorative elements to add length. Use the modeling too to blend the decorative rim into the pot’s body.
Step 10: Remove the coil pot from the terra cotta pot. Place the pot on a small piece of aluminum foil and bake at 275 degrees for 15 minutes.
Step 11: Remove the pot and allow it to cool. The clay will harden as it cools.
Ideas to take your coil pot to the next level:
- Experiment with the texture of the surface. Use different modeling tools to blend the coils. Use metal stamps on the decorative rim to leave impressions.
- What else could you make with the coil technique? Use coils to build and sculpt other objects.
Learning and Discussion Questions:
1. Before ceramicware was shaped using a spinning potter’s wheel, coil building was the popular handbuilding technique. This brief article on thepotterywheel.com provides an overview of the history of coil pots.
2. The coil technique can still be found in contemporary ceramics. Visit this link to learn more about prominent, contemporary artists who use the coiling method.
Thank you to our sponsor, PNC Arts Alive!, for helping to make this video possible!