Glue Gun Art
Explore line, color, and movement in this mixed-media art activity. You will use a hot glue gun to create raised lines on watercolor paper, forming a resist that guides and contains flowing liquid watercolor paint. As color spreads and blends within each section, experiment with transparency, layering, and tonal variation to create a one-of-a-kind design. This project encourages creative risk-taking, material exploration, and appreciation for how you can use resist techniques to control paint and surface.
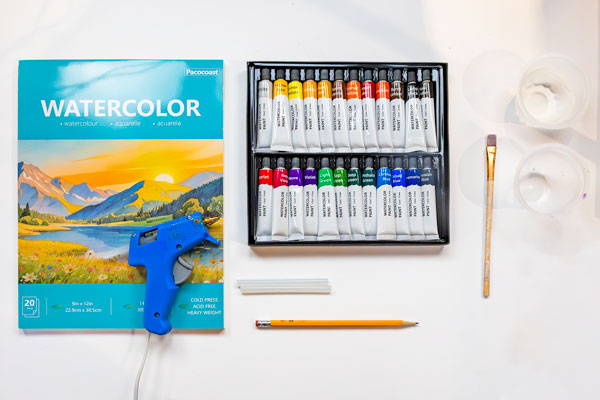
Materials:
– Watercolor Paper
– Liquid Watercolors
– Pencil
– Glue Gun
– Glue
– Small Bowls
– Paint Brush
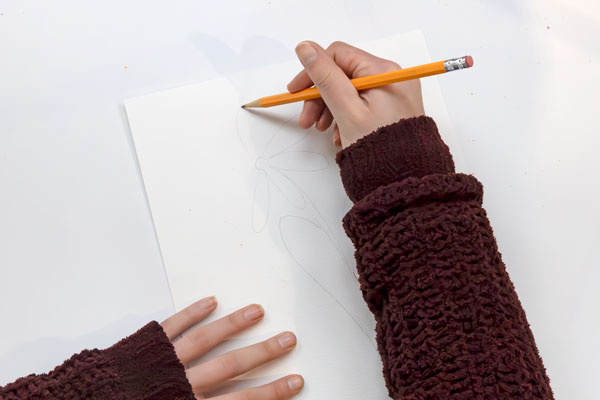
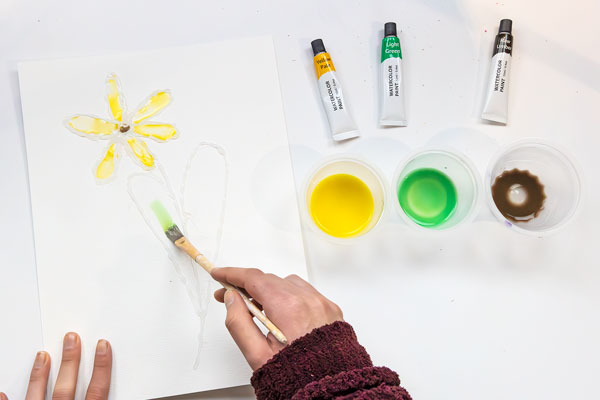
Step 1: Sketch a Design. Using a pencil, lightly sketch your own design directly onto the paper. Press gently so the lines remain faint. These lines are only meant to guide your glue drawing. If any lines are too dark, lightly erase them so they are barely visible before moving on to the glue gun step.
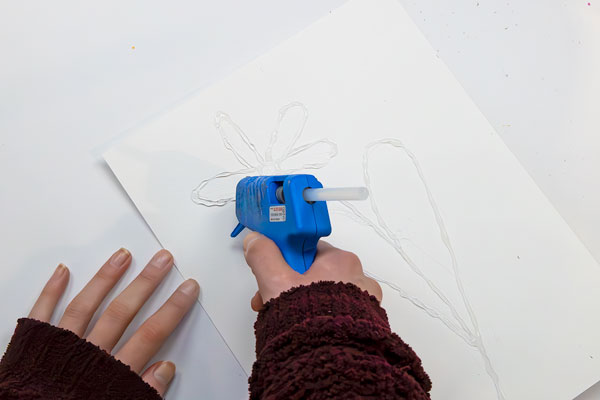
Step 2: Draw with Glue. Using a hot glue gun, carefully trace over your pencil lines with hot glue. For the smoothest, most continuous lines, keep the glue flowing and move the glue gun steadily along your design rather than stopping and starting. Once your design is complete, set the paper aside and allow the glue to fully dry before moving on to the next step.
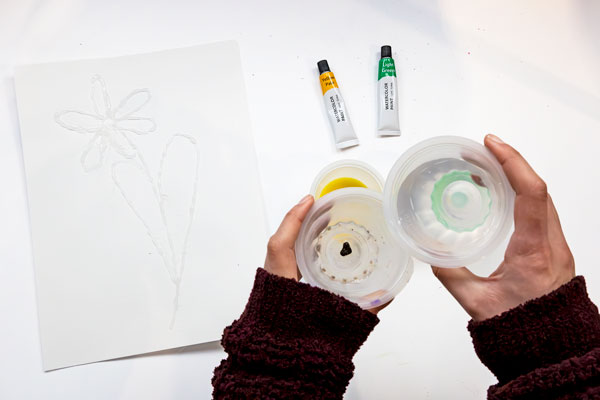
Step 3: Painting Your Design. Prepare your paint by adding liquid watercolor paint and water to small bowls or a deep paint palette. Mix approximately three parts water to one part paint. You only need a small amount of paint to cover multiple areas. Begin painting your design, working one section at a time. The raised glue lines will help contain the paint within each area. Use the tip of your paintbrush to gently guide the color right up to the glue lines for clean, defined shapes.
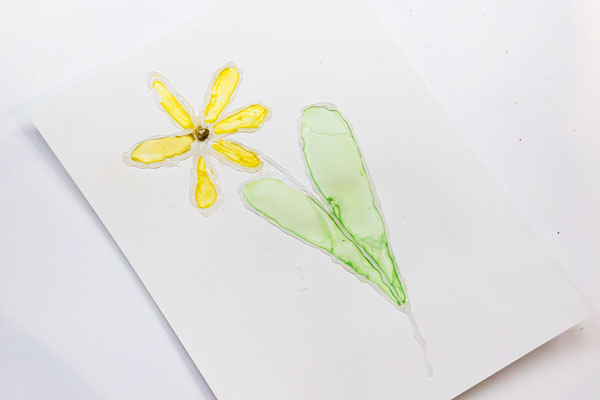
To create variation in color and tone, add fresh paint directly to areas where you want deeper, darker color. In other areas, add drops of clean water to spread the paint and create lighter, softer effects. You can also mix different colors of paint directly on the paper. For example, adding a touch of yellow on top of green will create a lighter, warmer shade of green.
Step 4: Drying. Allow your artwork to dry. This should happen fairly quickly on watercolor paper, but be sure not to tilt or move the paper until all of the water has fully absorbed into the paper.
Get creative with variations!
– Write a name, word, or short phrase with your glue lines and paint around and inside the letters.
– Challenge yourself to create your design using one continuous line without lifting your pencil.
– Limit your palette to two or three colors and explore how many shades you can make by adding water.
– Use warm colors in some areas and cool colors in others to create contrast.
– Blend two colors together in one section to create a smooth gradient.
– While the paint is still wet, sprinkle a small amount of salt onto the paper for added texture. Let it dry completely before brushing it off.
– Let your painting dry, then add a second layer of paint or details to build depth.
– Try painting wet-on-wet by adding clean water first, then dropping in color and watching it spread.
Further Learning and Discussion Questions:
Discussion questions for reflection:
- What part of your design or painting process did you enjoy the most, and why?
- Did anything change from your original idea once you started working with the glue or paint?
- How did the raised glue lines affect the way you applied color or water?
- What is one intentional choice you made in your artwork, such as a line, color, or technique?
- If you were to make this artwork again, what is one thing you might try differently?
Further Learning
Artist Spotlight: John Singer Sargent (1856–1925)
Although best known for his portraits, John Singer Sargent was also a masterful watercolorist who experimented with techniques that helped him control light, color, and surface effects in his paintings. In some of his watercolors, Sargent used wax as a resist to keep areas of the paper bright and untouched by washes, creating luminous highlights and crisp edges that enhance the form and contrast in his work. This approach is similar in spirit to the resist effects you explored in your activity, showing how materials can guide where paint stays and where it moves.
For example, in works like White Ships (1908), he combined transparent watercolor with wax resist and graphite underdrawing to achieve delicate yet striking effects. https://www.brooklynmuseum.org/objects/20397?utm
John Singer Sargent Watercolors. A slideshow and preview of many Sargent watercolors, including examples that use wax resist and related techniques.
https://www.mfa.org/exhibitions/john-singer-sargent-watercolors?utm