Kids ECO Camp: Butterfly Collages
Join us as we use the technique of collage to create three styles of torn paper butterfly collages! Learn how to create a torn paper mosaic using construction paper, a traditional torn paper butterfly collage using magazine paper, and a suncatcher-style collage butterfly using Saran wrap and tissue paper.
Materials:
- Sketch paper and pencil
- Construction Paper
- Magazine Pages
- Tissue Paper
- Saran Wrap
- Glue Stick
- Scissors
- Clear Tape
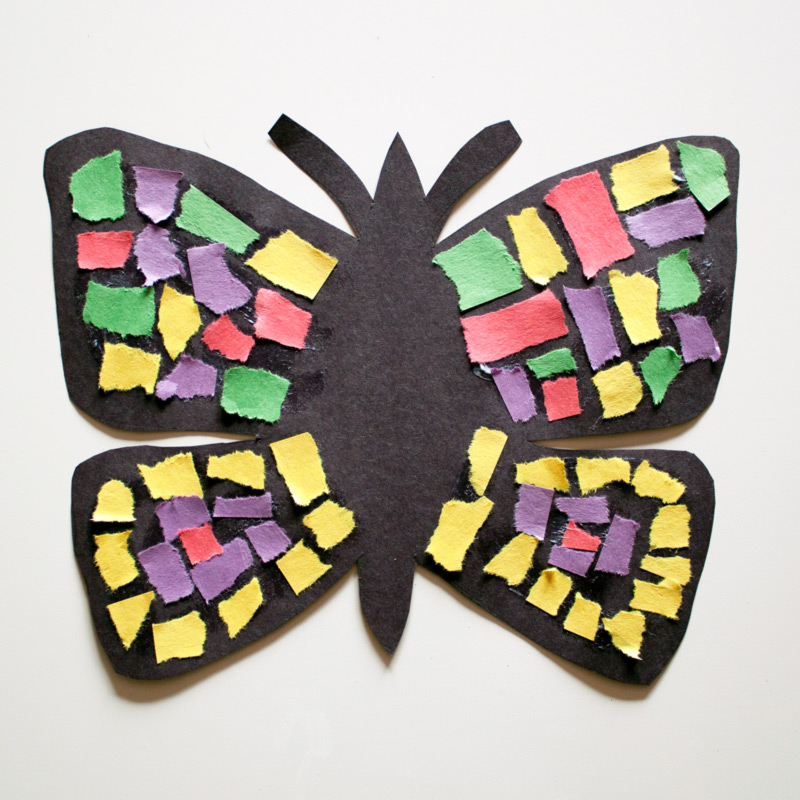
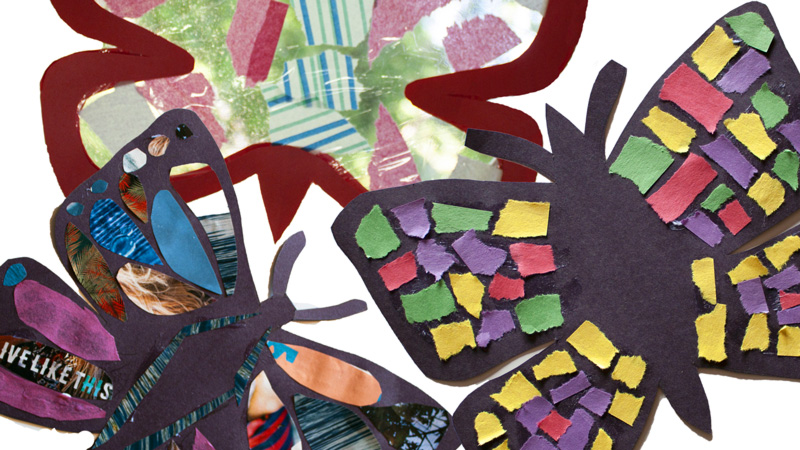
Torn Paper Mosaic Butterfly:
Step 1: Use your paper and pencil to create a traceable butterfly template. Fold your paper in half and along the fold, draw one side of the head, antennae, body, and wing of the butterfly. Use scissors to cut along your drawn line. Open the folded paper to reveal a full symmetrical butterfly shape.
Step 2: Trace your new butterfly template onto a colored piece of construction paper. Cut out the shape.
Step 3: Begin tearing small pieces of colored construction paper. These can be a variety of shapes.
Step 4: Use your glue stick to adhere the different colored torn-shapes to your butterfly.
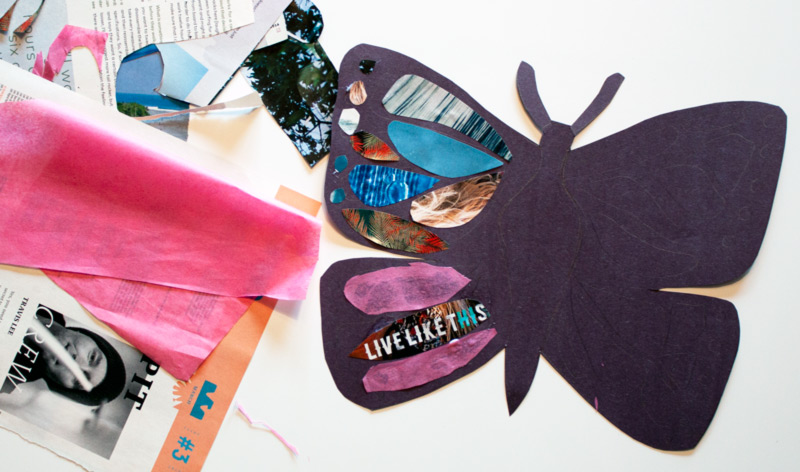
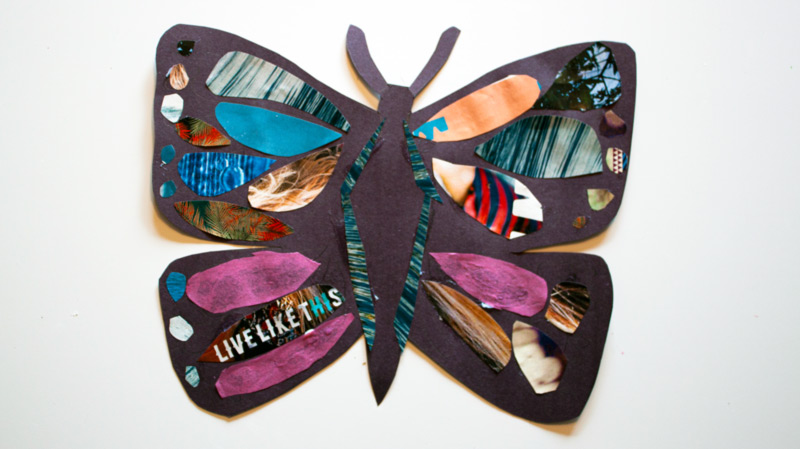
Cut Paper Collage Butterfly:
Step 1: Use your paper and pencil to create a traceable butterfly template. Fold your paper in half and along the fold, draw one side of the head, antennae, body, and wing of the butterfly. Use scissors to cut along your drawn line. Open the folded paper to reveal a full symmetrical butterfly shape.
Step 2: Draw shapes on your butterfly’s wings to use as guides. These will be the shapes you need to cut out from your magazine pages.
Step 3: Search through magazines to find interesting colored textures.
Step 4: Begin cutting and pasting your shapes onto your butterfly. In the tutorial, we used the monarch butterfly’s wing patterns as inspiration.
Step 5: Experiment with using different types of paper, such as tissue paper and scrapbook paper.
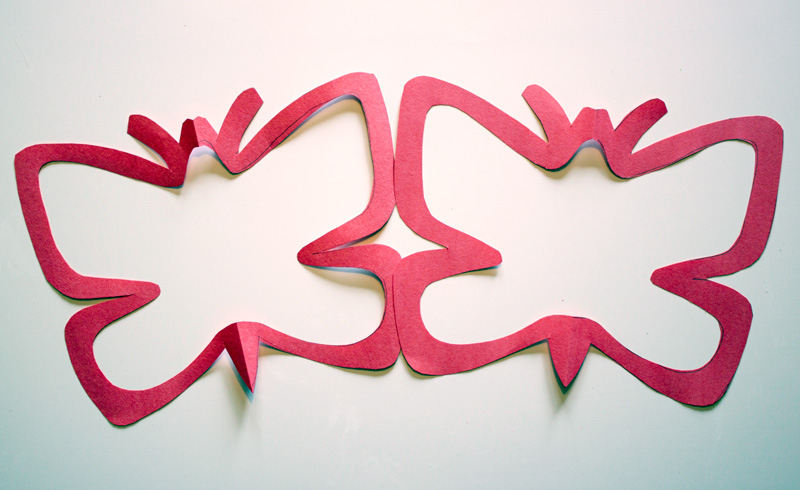
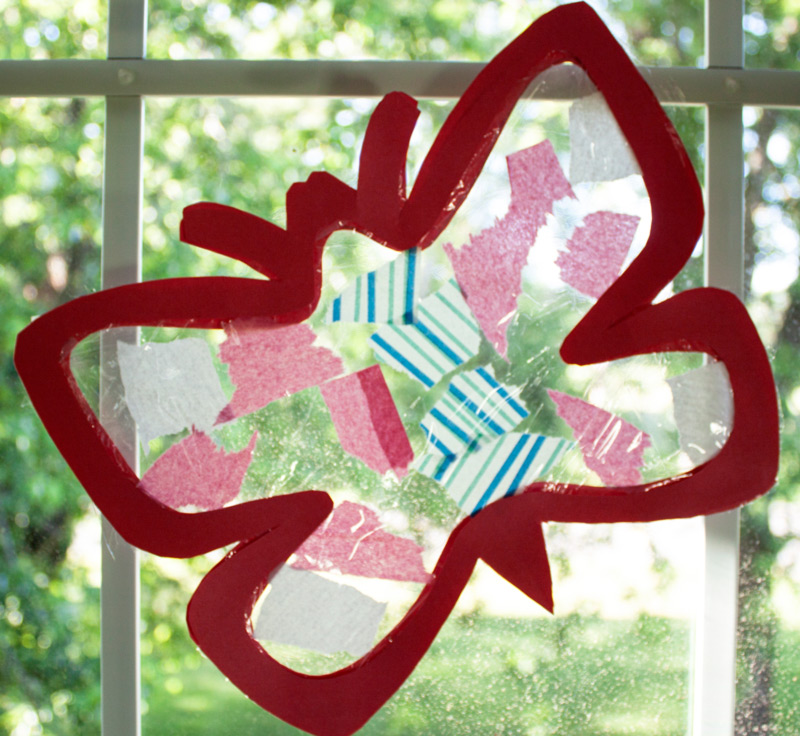
Suncatcher Collage Butterfly:
Step 1: Use your paper and pencil to create a traceable butterfly template. Fold your paper in half and along the fold, draw one side of the head, antennae, body, and wing of the butterfly. Use scissors to cut along your drawn line.
Step 2: Next, draw another line one inch from the edge of the paper. This will create the width of the frame. Use your scissors to cut out the center section. Unfold the paper to reveal a frame.
Step 3: Make a second frame. It should be the exact same shape. The best way to accomplish this is to trace the frame you just made.
Step 4: Cut a section of Saran wrap that is larger than the frame. Place your frame on the table and place the saran wrap on top of that. Trim the saran wrap that extends beyond your frame. Use clear tape to adhere the Saran wrap to the frame.
Step 5: Tear small pieces of tissue paper.
Step 6: Place your tissue paper pieces onto the saran wrap. Make sure to leave some area of the saran wrap exposed. When you place your second piece of Saran wrap on top, it will adhere to the other piece.
Step 7: Once all of your tissue paper is placed, cut another piece of saran wrap and place it directly on top of the tissue paper.
Step 8: Use your glue stick to place glue only on the frame portion of your work. Place the other frame on top and press firmly to adhere the two together.
Learning and Discussion Questions:
1. Did you know that the monarch butterfly is one of the most recognizable and studied butterflies on our planet? Visit NationalGeographic.com to learn more about monarch butterflies.
2. The word collage was first used to refer to works by Dada and Surrealist artists, especially Max Ernst. His collages were composed of old engravings and prints that had been skillfully cut and pasted together to form disquietingly irrational images. Visit Encyclopedia Britannica to learn more about the history of collage.
Thank you to our sponsor, PNC Arts Alive!, for helping to make this video possible!