Paper Helicopters
Create your own flying paper helicopter using just a few household materials! This simple activity introduces basic principles of aerodynamics and is a fun way to explore how things spin and fall through the air. Try adjusting the size and weight of your helicopter to experiment with different flight patterns!
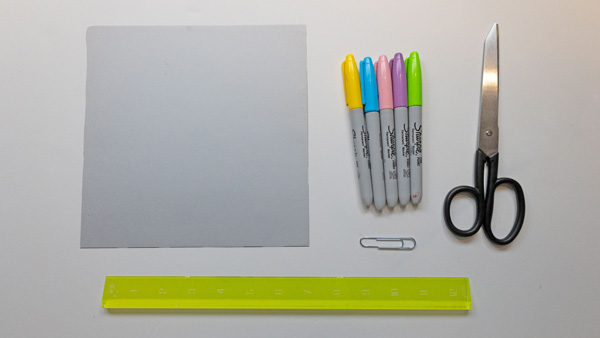
Materials:
- One sheet of paper (cardstock)
- Scissors
- One paper clip
- Ruler (optional)
- Markers or crayons (optional, for decorating)
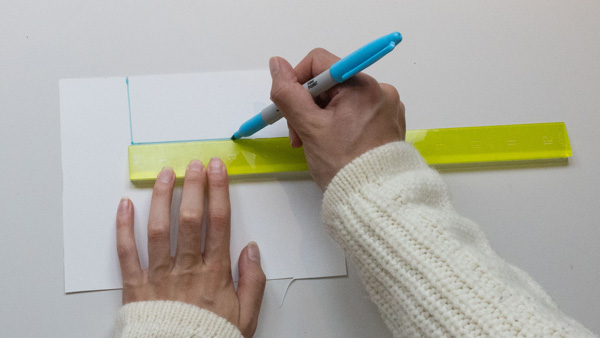
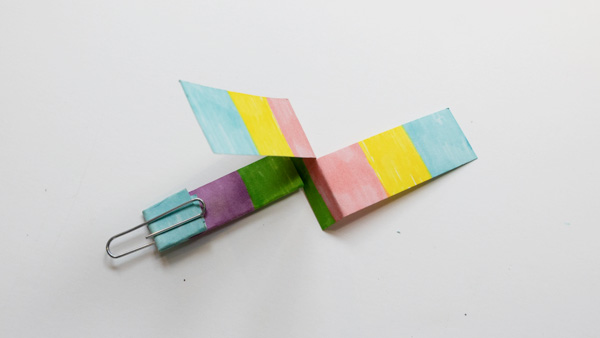
Step 1: Cut your rectangle. Start by cutting a strip of paper that measures approximately 6 inches tall by 2 inches wide. Don’t worry if it’s not exact. This is a great chance to experiment with different sizes!
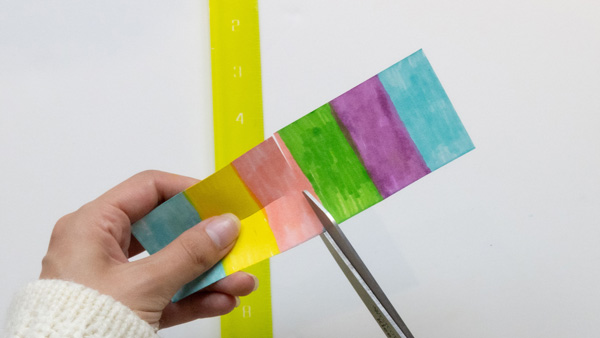
Step 2: Make the top slit. From the top (one of the short ends), cut a straight slit down the middle, about 3 inches long. This will form the two blades of your helicopter.
Step 3: Add side cuts. About halfway down your rectangle, cut two small slits—one on each side—about 1 inch long. These should be opposite each other and will help create the helicopter body folds.
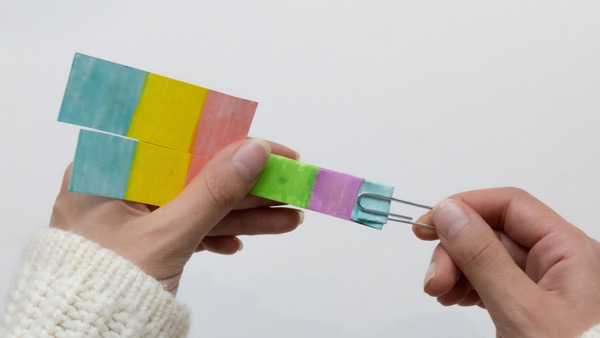
Step 4: Fold the bottom. Fold the bottom section of the rectangle (below the side cuts) inward from both sides so they overlap slightly. This helps form the base of your helicopter. Then, fold the very bottom up once to create a small flap.
Step 5: Add a paper clip. Slide a paper clip onto the folded bottom flap. This adds weight to help your helicopter stay upright and spin as it falls.
Step 6: Fold the blades. At the top of your helicopter, fold one of the flaps forward and the other one backward. These are your spinning blades!
Step 7: Test it out! Hold your paper helicopter above your head and drop it. Watch it twirl and spin through the air as it falls! Try dropping it from a higher place (with adult supervision), like standing on a step or chair.
Explore & Experiment:
- Try different paper sizes or shapes.
- Add more than one paper clip to change the weight.
- Decorate your helicopter with patterns or colors.
- Challenge your family to a “landing zone” target game!
Further Learning and Discussion Questions:
Discussion questions for reflection:
– What do you think makes the paper helicopter spin as it falls?
Follow-up: How do the blades affect the way it moves through the air?
– What happens if you add more paper clips or use a different size of paper?
Does the helicopter fall faster, slower, or spin differently?
– Why do you think the paper helicopter doesn’t just drop straight down like a rock?
What forces do you think are working on it as it falls?
– Can you think of real-life machines or objects that use spinning blades like this?
How are helicopters, fans, or wind turbines similar or different from your paper helicopter?
Further Learning
- Watch & Learn: Explore the Forces of Flight. Receive an introduction to the concepts of gravity, lift, drag, and air resistance through engaging, age-appropriate videos. These concepts explain why your paper helicopter spins and falls the way it does!
Watch this video from SciShow Kids to learn about the four forces of flight:
https://www.youtube.com/watch?v=5ltjFEei3AI
- Crash Course Kids This engaging Crash Course Kids episode clearly explains how forces make things speed up, slow down, or change direction, just like in our paper helicopter activity. You’ll get great visuals and simple language that reinforce learning.
https://www.youtube.com/watch?v=l-6ERzL9QsE&embeds_referring_euri=https%3A%2F%2Fchatgpt.com%2F&source_ve_path=Mjg2NjY
How to Use This Video:
– Watch together before or after flying your helicopters to link the forces you see on screen to the spiraling action of your craft.
– Ask questions during the video, such as: “Where do we see gravity pulling down? What counters that so it spins slowly?”
– Try a mini-experiment: Drop objects of different weights (like a paperclip or small eraser) and predict which one falls faster, then relate it back to what you saw.