Finger Knitting
Learn two creative methods of finger knitting! In this Family Art Workshop, we focus on the chain stitch and the four-finger method of finger knitting. Participants will learn how to craft their own chain stitch friendship bracelets and chunky finger-knit accessories using just yarn and their fingers—no knitting needles required! With simple step-by-step guidance, you will create slip knots, loop stitches, and add personalized touches like beads to make each piece your own. Whether you prefer a delicate one-finger design or a bold four-finger knit, this activity is a fun and relaxing way to explore textile art, build fine motor skills, and express your unique style.
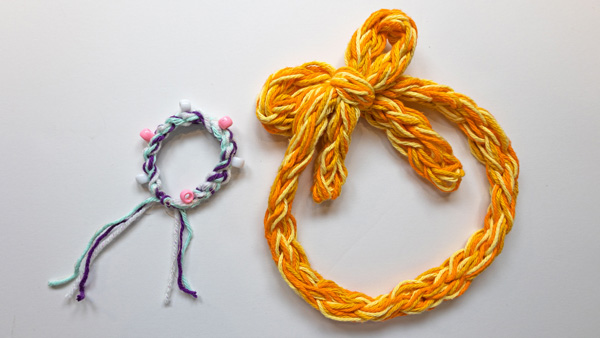
Chain Stitch Friendship Bracelets
Four-Finger Knitting
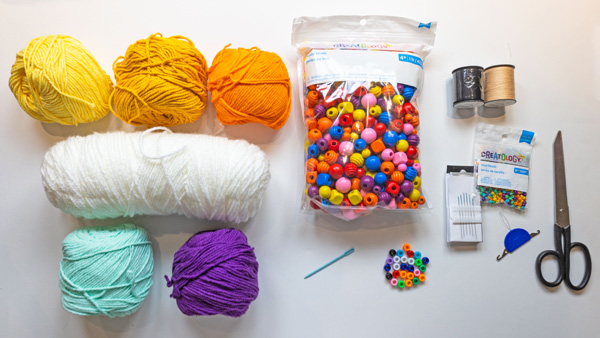
Materials:
- Yarn
- Beads (wooden, seed, and/or pony)
- Yarn Needle
Instructions for Chain Stitch Friendship Bracelet:
Step 1: Choose either one, two, or three colors of yarn.
The more strands you use the thicker your bracelet will be.
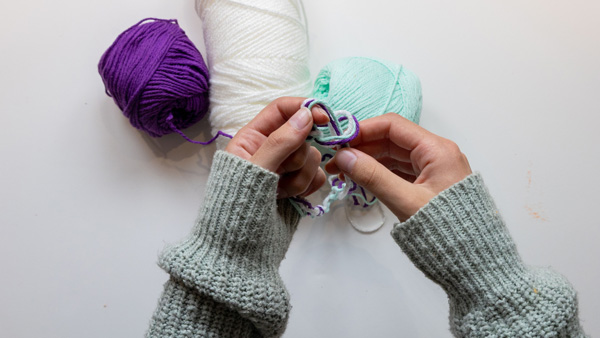
Step 2: Create a slip knot. A slip knot is an adjustable loop that starts your yarn project. You can tighten or loosen it by pulling the yarn!
Make a Loop:
- Take the tail end of your yarn (the loose end, not the one attached to the ball).
- Cross the tail over the working yarn (the part still connected to the ball) to create a loop
— it will look like the shape of a number 6 or a pretzel.
Pinch the Loop
- Pinch the place where the yarn crosses over itself, forming a loop. Hold it gently between your thumb and finger.
Pull Yarn Through the Loop
- With your other hand, reach through the loop and grab a piece of the working yarn (not the tail).
- Pull it up through the loop — you’ll see a new loop forming.
Tighten the Knot
- Hold the new loop and gently pull the yarn tail to tighten the knot at the base.
- Congratulations! You’ve made a slip knot.
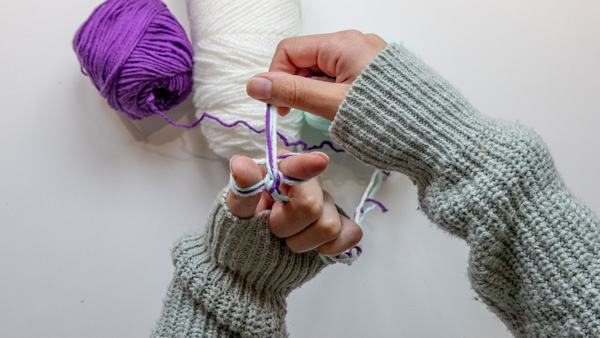
Adjust the Loop
- Pull the working yarn to make the loop smaller.
- Pull the loop itself to make it bigger.
- It should slide and adjust easily — that’s how you know it’s a slip knot!
Step 3: Place the slip knot over your thumb and first finger of your non-dominant hand. You will have two strings of yarn hanging. One is the tail end (it is short and considered the non-working tail end). The second is your working yarn, which leads to your ball/s or skein/s of yarn. Pass the working yarn between your thumb and forefinger and pinch it in place.
Step 4: Pull the pinched yarn through the slip knot loop. Then, pull on the working yarn to tighten the loop. DO NOT completely tighten to close the loop. You will need to place the loop over your forefinger and thumb.
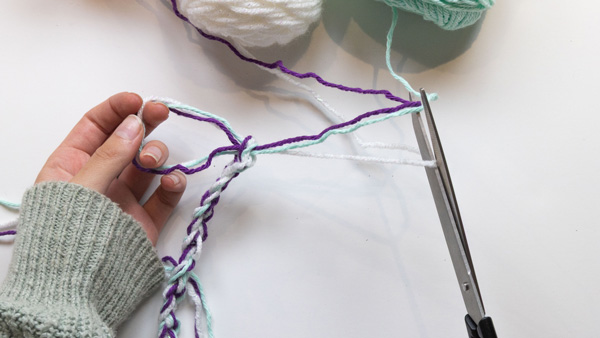
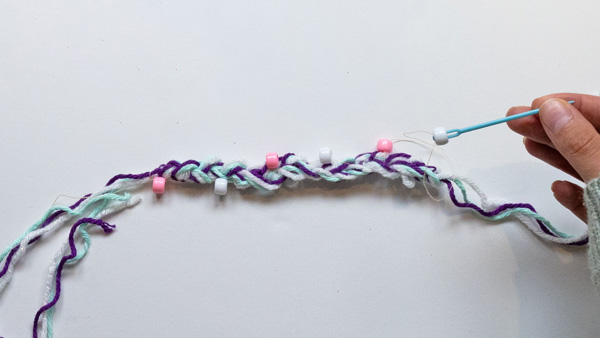
Step 5: Once you reach the desired length, cut the working yarn and place the end through the slip knot and pull it tight to secure.
Step 6: Add any beads or gems to your bracelet by threading them onto the bracelet using a yarn needle. For the thicker bracelets, you may have to tie the bead into the stitches rather than over the entire thickness of the bracelet. Experiment with different-sized beads- we recommend wooden beads for threading over the bracelet and seed beads (requiring a beading needle) to add tiny dots of sparkle to your bracelet.
Instructions: Four-Finger Knitting
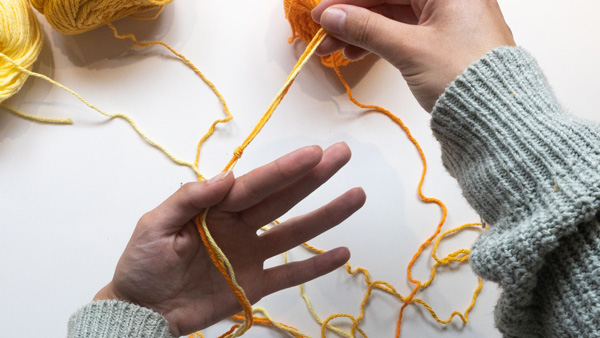
Step 1: Choose two to three colors/balls/skeins of yarn. The more strands the thicker and tighter the finger-knit stitches will be.
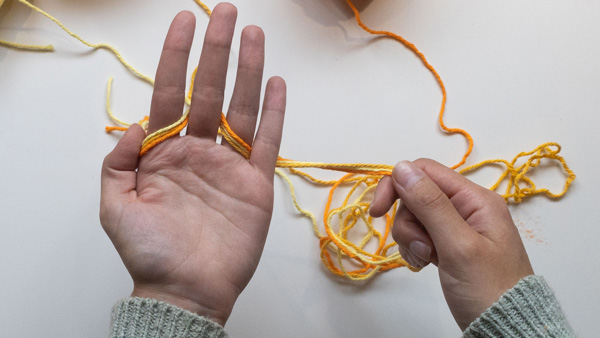
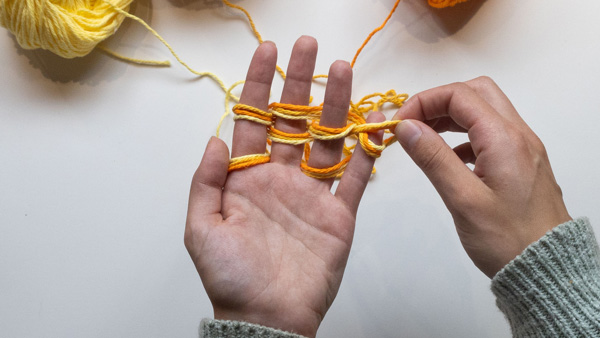
Step 2: Begin with the palm of your hand facing you with the tail end of the yarn between your thumb and index finger. Pinch it tight! The tail end should be hanging over the back of your hand, not your palm. Weave the yarn in front of your index finger and behind the middle finger, then in front of the ring finger. Wrap the yarn around your smallest finger and weave back, alternating in front of and behind, until you reach your index finger. Be sure to keep the yarn somewhat loose, but not sloppy. If the yarn is too tight, it will be hard to lift over your fingers to achieve the stitches.
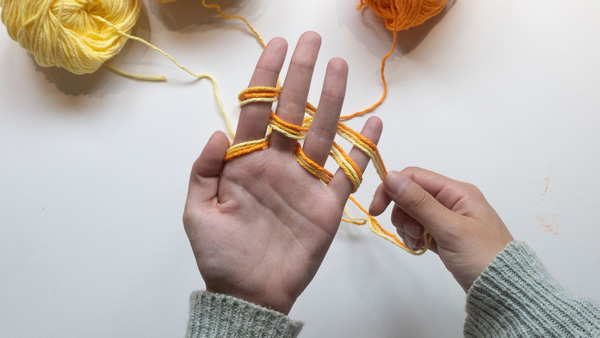
Step 3: Wrap the yarn around the index finger again and continue weaving as you did before. This second row should be above the first row of stitches. End with the index finger you began with.
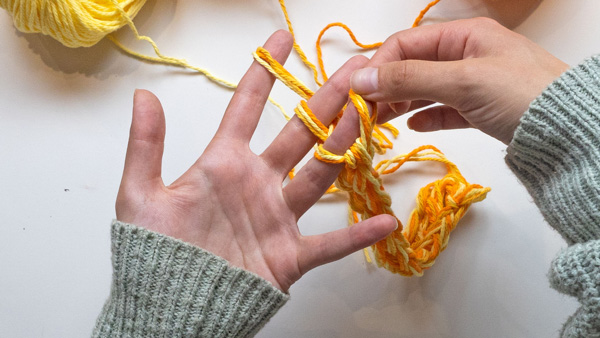
Step 4: The first row of stitches begins with the little finger; lift the bottom row of wrapped yarn up and over the tip of your finger. You can bend your finger down to help you lift the bottom row over the tip of your finger. Be sure that you keep the top row of wrapped yarn on your finger as you go!
Step 5: Continue the process of lifting the bottom row of stitches over the top row of stitches along your hand until you get back to your index finger.
Step 6: For the next rows, weave the yarn around the fingers again, ending with the index finger as you have done. Then, lift the bottom row of wrapped yarn over the top as you have done.
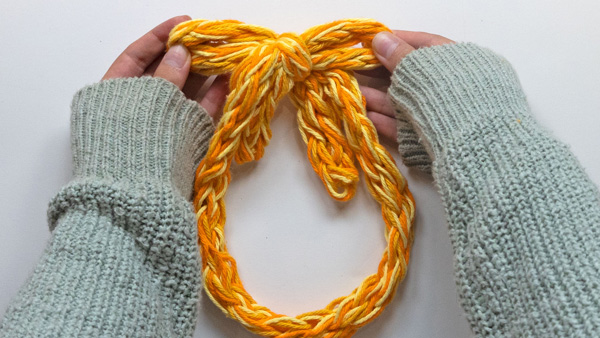
Step 7: As you finger-knit, you will see the knitted fabric appear behind your hand. Continue finger-knitting until you reach the desired length. Project suggestions include a chunky knitted bracelet or a thin knitted scarf, belt, or headband.
Step 8: To end your knitting, lift the stitch off the little finger and pass it across to your ring finger. Then lift the bottom stitch over the top stitch on your ring finger. Continue to pass the stitches across and over until you get to the index finger with one stitch remaining.
Further Learning and Discussion Questions:
- Discussion questions for reflection:
– What differences did you notice between the one-finger chain stitch method and the four-finger knitting method? Which did you find easier or more enjoyable, and why?
– How does the act of finger knitting make you feel? Did you find it calming, energizing, or something else entirely?
– In what ways can you personalize your finger knitting project to reflect your individual style or cultural identity?
– What are some creative uses for your finished finger-knitted piece beyond bracelets or scarves? Can you imagine using finger knitting in other art projects or functional designs?
- Further Learning
Explore the history of knitting by watching the video “A Brief History of Knitting” and reading the article “A History of Hand Knitting” by the Victoria and Albert Museum (V&A). You will learn how this craft evolved from a necessity to a form of art. From ancient Egyptian socks crafted using nålbindning to the rise of medieval knitting guilds, V&A traces how hand-knitting evolved from necessity to art form. Whether you’re a beginner or a fiber arts enthusiast, this article offers a rich, visual journey through the cultural history of yarn and stitches across time.
https://www.youtube.com/watch?v=HnFfF3v1rb0&t=7s
https://www.vam.ac.uk/articles/the-history-of-hand-knitting?utm