Yarn Birds
Create your own flock of springtime birds! Yarn Birds are a perfect activity for kids and adults alike. This activity transforms scrap yarn into a flock of feathered friends. No sewing or knitting skills required—wrap, shape, and watch your colorful creations come to life!
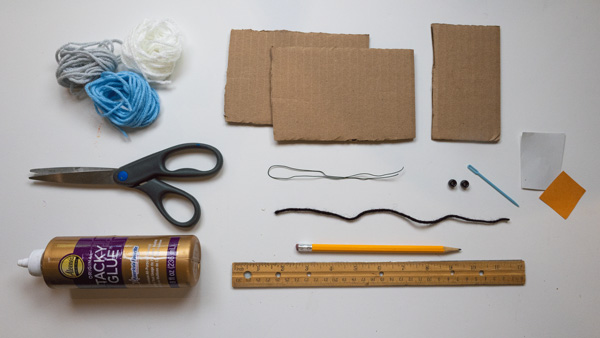
Materials:
- Cardstock, cut into three pieces (1, 5”x 3” and 2, 4” x 6” )
- Ruler
- Scrap Yarn
- Scissors
- Paper
- Craft Glue
- Craft Wire or Small Sticks
- Craft Pliers
- Beads (2 black, medium-sized)
- Needle
- Black Thread
Instructions:
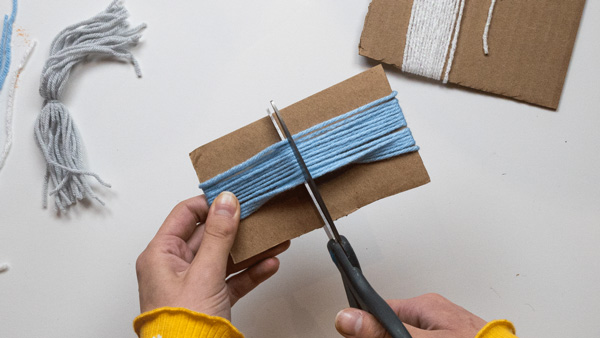
Step 1: Choose three colors of yarn. Wrap one color around the 5” x 3” cardstock and two colors around the 4” x 6” cardstock until it is about ½” thick. Cut the yarn on one side to release it from the cardstock.
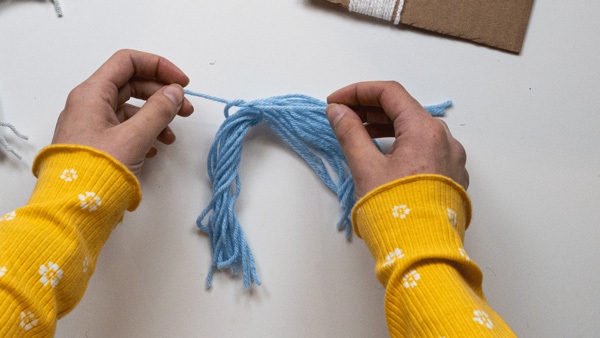
Step 2: Tie the bundles of yarn together with matching yarn.
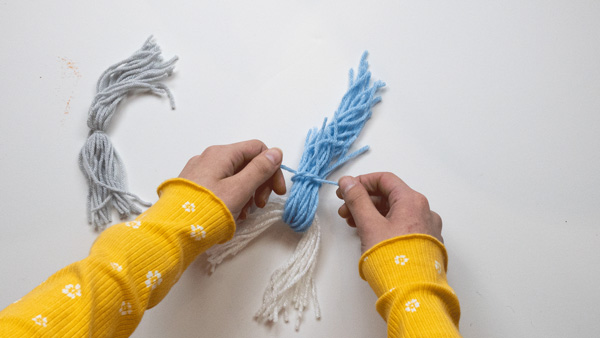
Step 3: Take one of the long bundles and the short bundle. Link them together in the center by placing them perpendicular and folding them each in half. Use small, single pieces of the same color yarn to tie the folded yarn close to the center where they are folded onto each other.
Step 4: Take the third bundle of yarn and place it perpendicular to the two previous bundles that are linked together.
Step 5: Take a small piece of paper. Crumple the piece of paper and squeeze it to make it small ball. The size of the bird’s body depends on the size of the crumpled paper. Place the crumpled paper on top of the yarn bundles, near the center. Grab the ends of the yarn bundles together tightly, engulfing the crumbled paper. The paper ball is now in the center of the yarn bundles.
Step 6: Use a small piece of any color of yarn to secure the yarn bundles around the paper. Tie it tightly. Trim the ends of yarn to make them even.
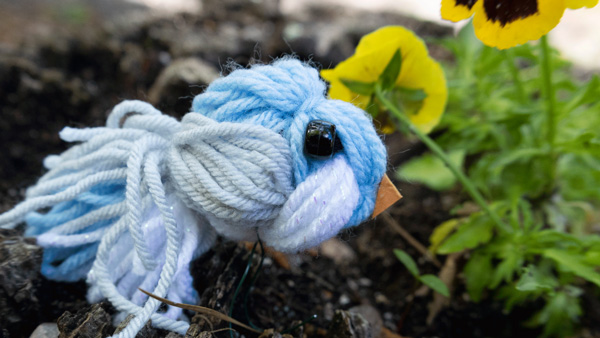
Step 7: Make a small bird beak from a piece of cardstock. Glue to beak to the bird’s head.
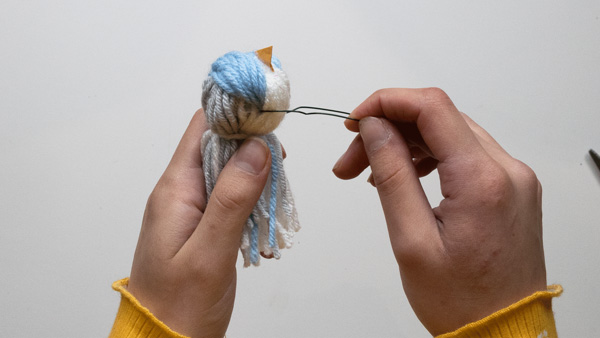
Step 8: Use sticks or craft wire to make bird legs. Attach them to the bird’s body using craft glue.
Step 9: Attach two beads to the bird’s head, one to each side. Use thread and a needle or craft glue.
Further Learning and Discussion Questions:
- Discussion questions for reflection:
– What part of the yarn bird-making process did you enjoy the most, and why?
– How did you choose the colors and textures for your bird? What do they say about your personal style or mood today?
– Did anything about this activity surprise or challenge you?
– How do you think creating something with your hands affects your mood or focus?
– If your yarn bird could tell a story, what would it be?
– How might you share this activity with someone else—like a friend, sibling, or grandparent?
– What other animals or objects would you like to try making with yarn?
- Further Learning
After creating your yarn birds, take your curiosity a step further by exploring the real birds that inspire them! New Jersey is home to a wide variety of beautiful bird species, from the bright red Northern Cardinal to the cheerful American Goldfinch (our state bird!). Visit a local park, a wildlife refuge, or the grounds of WheatonArts with binoculars and a bird guide, or explore resources like the New Jersey Audubon Society’s website to learn about bird calls, habitats, and migration patterns.
– Compare your yarn bird to a real bird species. What colors and shapes are similar or different?
– Keep a sketchbook or photo log of birds you see in your neighborhood.
– Build a simple bird feeder or birdhouse to attract native birds and observe them up close.