Flower Press & Pressed Flowers
Extend the life of those beautiful spring & summer blooms! Creating a flower press is easy & inexpensive. Use your pressed flowers for various crafts, including botanical bookmarks, handmade greeting cards, or as inclusions in handmade paper.
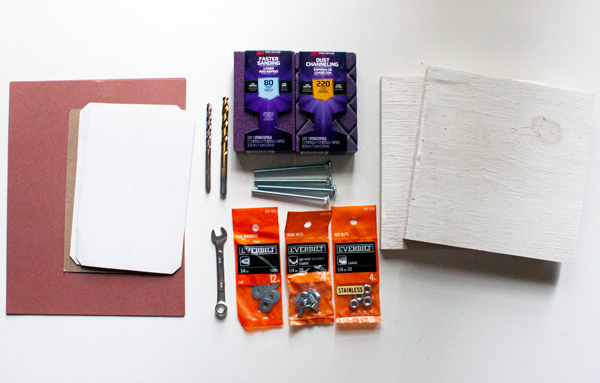

Materials:
- Wood Panels (two 8″ x 8″ ¾ inch)
- Carriage Bolts (four ¼” x 3 ½”)
- Washers (eight, ¼”)
- Wing Nuts (four, ¼”)
- Nuts (four, ¼”)
- Smooth Cardboard
- Paper
- Fresh Flowers
- Drill and Bit (¼” and 5/16″)
- 120 Grit Sandpaper
- Wrench
Making the Press:
Step 1: Purchase or use scrap wood panels that are 8″ x 8″ or larger if needed. The wood should be at least ¾” thick to be strong enough not to bend when pressure is applied.
Step 2: Measure, mark, and drill holes into the four corners using a ¼” drill bit. Stack the two panels, hold them firmly, and drill through both simultaneously to ensure that the holes align. Redrill the top panel with a slightly larger bit to make it easier to remove.
Step 3: If needed, use 120 grit sandpaper to clean up the drilled holes and the panel edges to remove any splitters.
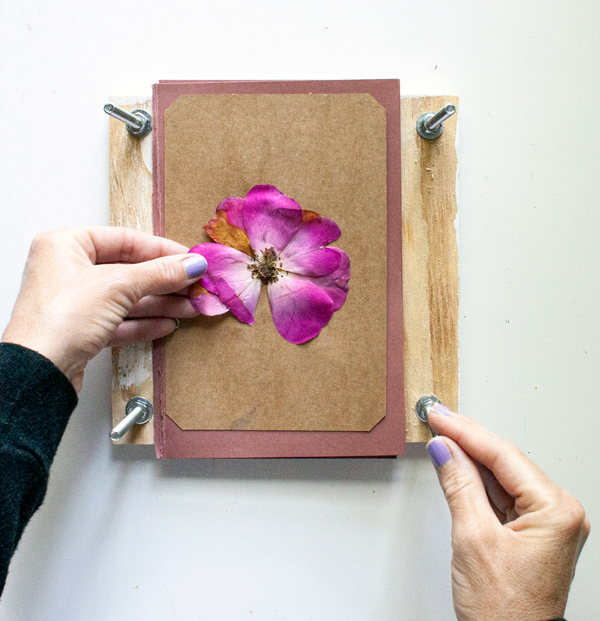
Step 4: Place the carriage bolts through the bottom panel of wood. On the other side of the wood, add one washer and one nut to hold the carriage bolt in place. When you remove the top panel to see your pressed flowers, this nut prevents the carriage bolt from falling out of the bottom. Repeat in all four corners. Tighten the nuts with a wrench.
Pressing the Flowers:
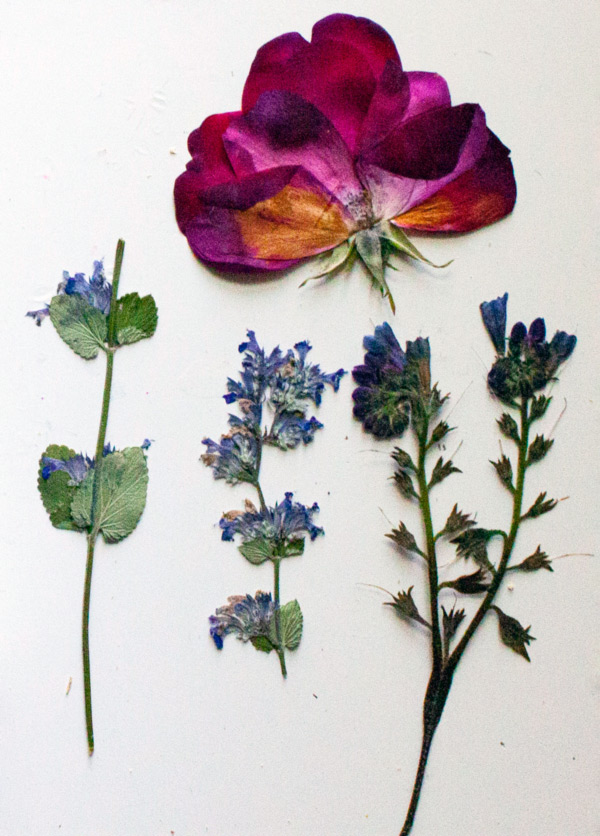
Step 1: Pick flowers that have minimum volume/thickness. Flowers with a lot of volume have more moisture and may not press and dry as nicely.
Step 2: Begin to layer the press with a piece of cardboard and then two sheets of paper. Place flowers directly on the paper, leaving room between the blooms. Experiment by laying some flowers sideways and others face down. Once arranged, add two sheets of paper and another piece of cardboard.
Step 3: If you have more flowers to press, continue this layering method until the press is full or until you run out of flowers.
Step 4: Slide the top wood panel over the stacked flower layers. Add the washers onto the bolts, followed by the wing nuts, and tighten them snugly. After a few hours or the next day, tighten the wing nuts further as the paper absorbs the flower’s moisture and flattens.
Step 5: Check on the status of the flowers after 12 to 24 hours. Remove when they are flat and are no longer sticking to the paper. If they are sticking to the paper, moisture is still present. Replace any wet and wrinkled paper with dry ones. Flowers should be dehydrated and ready after one week.
Ideas to take your pressed flowers to the next level:
- Add pressed flowers to handmade paper to create beautiful botanical inclusions.
- Use pressed flowers in resin projects to add a hint of nature.
- Arrange the flowers in a frame and hang them on a wall.
- Secure pressed blooms to heavyweight paper and seal with Modge Podge to create bookmarks.
Learning and Discussion Questions:
1. Use your pressed botanicals to create a nature journal. Join The Nature Journal Club online! The Nature Journal Club is a diverse community of artists and naturalists of all levels who meet together to connect to nature through art. Founded by artist, educator, and author John Muir Laws, the group is centered in the San Francisco Bay Area. Still, it is open to anyone worldwide with a passion for exploring nature with a journal.
2. Pressed flowers date back to ancient civilizations. The site Gardenguide.com presents a brief timeline of pressed flowers throughout history.
Thank you to our sponsor, PNC Arts Alive!, for helping to make this video possible!